Taming the GumPack #3 camera
Adding an external USB power supply
Record up to 7 Hours of continuous Video!
Preface
Before I start, I want to make it clear that I only have very basic electronics knowledge and soldering skills. I have never soldered SMD before, and I hope I never need to do it again! I know what passive components are and I understand the basics of a simple transistor. That's it.
As such, I cannot guarantee that my method is correct. So, if I have done anything seriously electronically wrong, please do tell me. I have recorded about 40 hours of video and the modified GumPack works perfectly (I dare to say, much better than the original). During 3 days I recorded non-stop, 6-7 hours, of video to a 32GB SD card using an external USB battery pack. If the internal battery is flat when you start, it will be completely recharged by the time the recording is finished! If the external battery pack runs out of juice during the recording, you will lose up to an hour (4GB) of video. Even if the battery is fully charged, it won't take over. Using the external USB battery pack you will be able to record even if the power switch is OFF. When recharging, there is no indication when the charge is completed. You can recharge in the On or Off position. Charging for 2 hours seems enough.
If you also want to get rid of the very annoying timestamp on these cameras, then please click here.
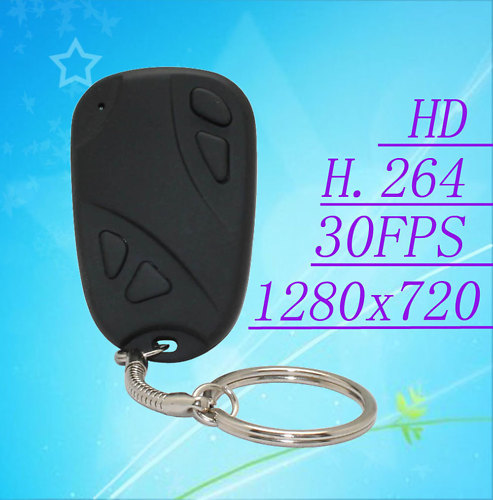
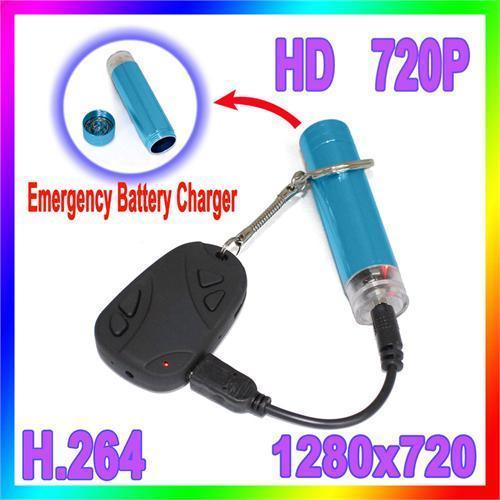
Newsflash January 2011: A Brand New type of camera, the #11, is now available. The video quality is amazing and is true High Definition Video. Unfortunately it only exists as a keychain (808) model so far, so please pester the seller, who is also the manufacturer and designer of this gem, if you want a H.264 GumPack model. I believe he will produce the GumPack model if there is enough demand for it - so please ask him! The more people ask for the GumPack HD, the more likely it is that they will produce it! The seller supplies firmware to use the camera without the timestamp! Firmware update is an easy process, unlike the #3. The manufacturer also sells a so called "Emergency battery charger" which will let you charge the internal battery AND record at the same time. You can contact the seller directly at hotbid365@gmail.com. The seller is very helpful and has technical knowledge about these cameras. You can also view the HD H.264 camera in the seller's ebay store: http://stores.ebay.com/power-gps. Don't be misslead by cheaper offers from other sellers for fake HD cameras. These are NOT H.264 or HD 720P cameras!
|
The Layout
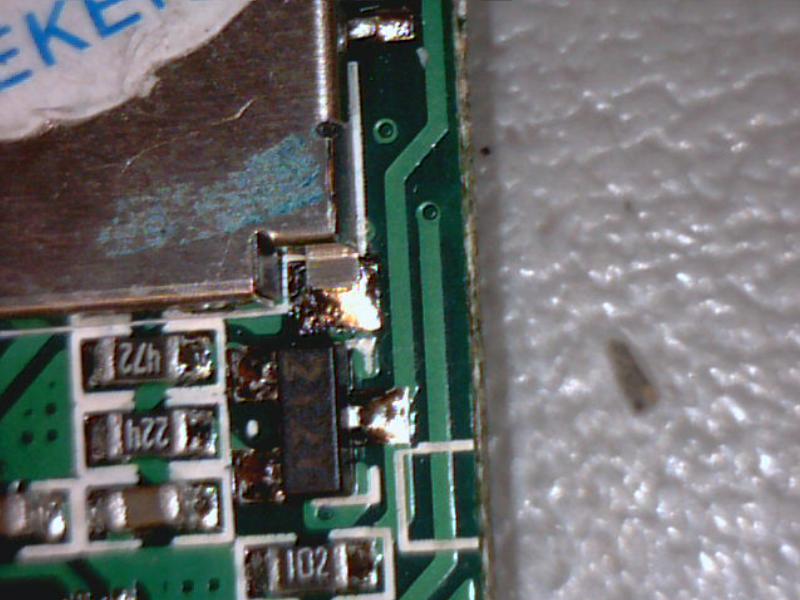
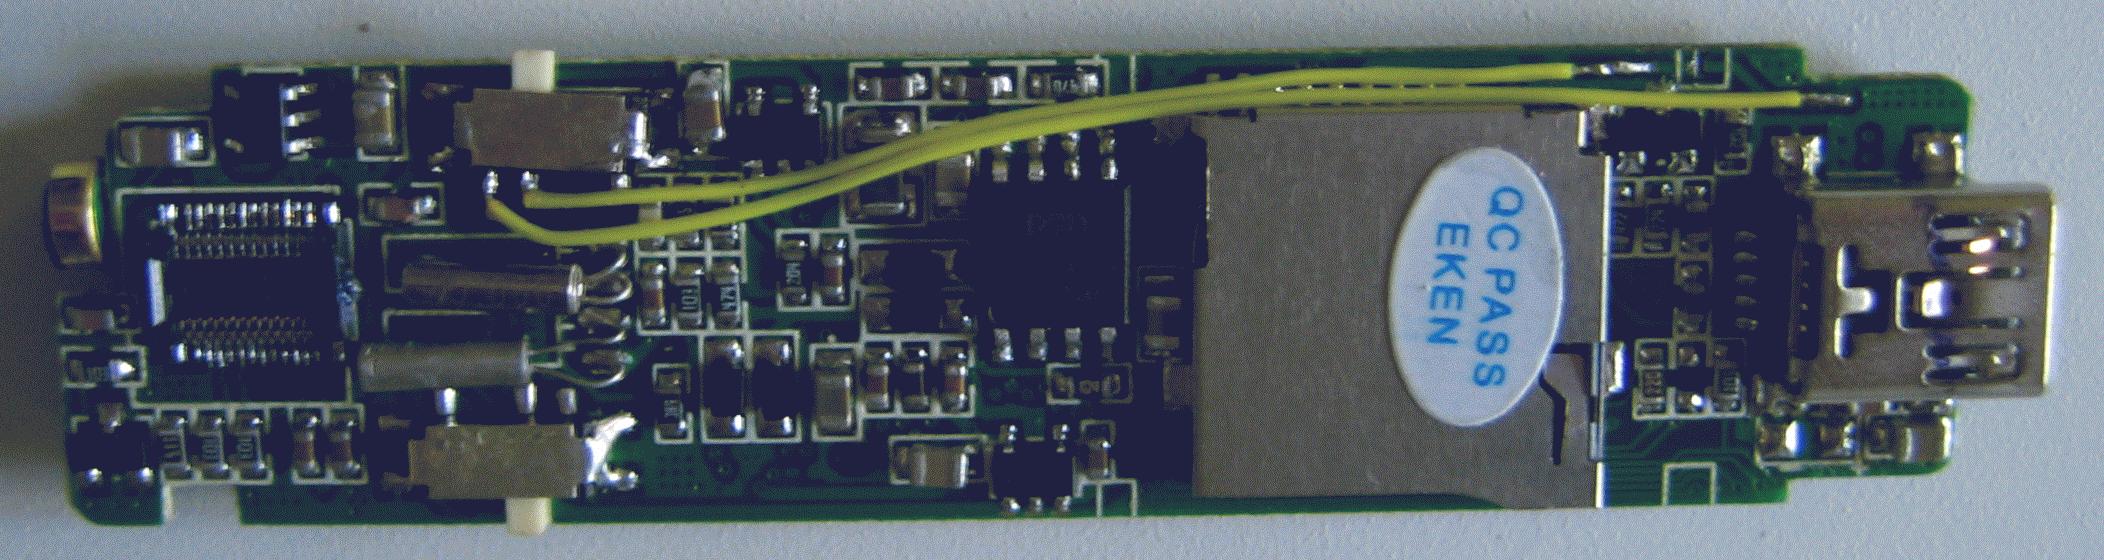
If the layout of your GumPack #3 camera looks exactly like the photo below, then this project is for you. If it doesn't, then you will have to locate the correct track to cut yourself.
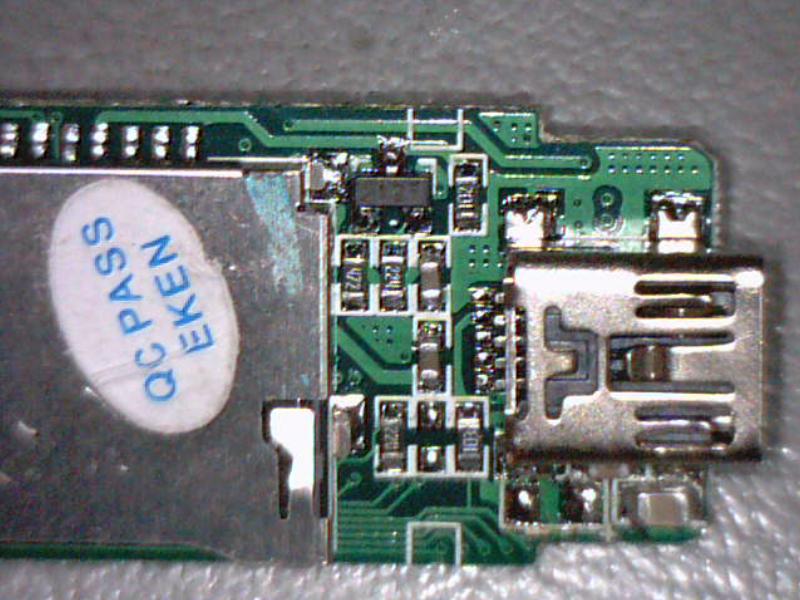
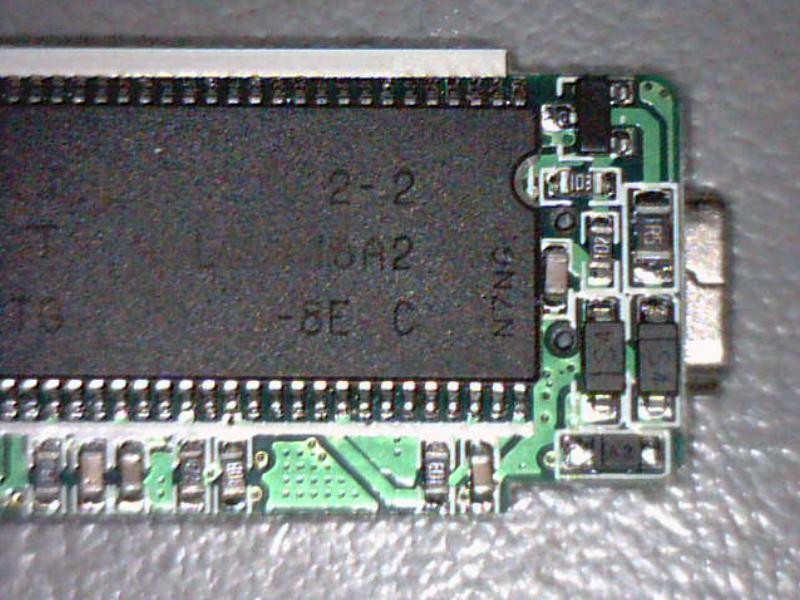
After studying the available circuit diagrams for the Anyka models, it was obvious that there are two branches from the USB socket. The charging circuit appears to be completely isolated from the other USB stuff. I figured that the SunPlus models use a similar design. I followed the +5V tracks on my GumPack from the USB socket. The track goes almost immediately to the reverse side. Here the track is divided into two "sides". On one side there are resistors and capacitors (the charger circuitry), on the other side there are three diodes and then the track goes to the front side again. This is the track to cut. I initially attempted to remove a diode, but since my SMD soldering skills are Zero, I almost bodged up on this.
The Project
There are two parts to this project. In the first part, I will show you how you can record on your GumPack #3 using an external USB battery pack. Using this method, you can no longer use the camera as a USB device. This means that you will have to read the SD card in a card reader. If you are very careful, you can do the first part without removing the battery, but it is safer and easier if you remove it.
The second part requires pretty good soldering skills but goes a step further. Since I don't need the photo modus, I will show you how to modify the Photo-Video switch to switch between USB mode and External Battery Mode. I have not tested the webcam mode and I really don't care if this works or not because I don't think that anyone needs it. The new switch positions are: Video position = USB External Battery mode, Photo position = Normal USB mode
Tools Needed
- A small cross-head screwdriver for the 8 screws
- A very sharp mini carpet knife or similar
- Liquid Tipp-Ex or white paint (maybe, see below)
- A fine tipped SMD soldering iron (recommended, required for part 2)
- Very thin low melting point solder, 0.25mm is ideal (recommended, required for part 2)
- Thin desoldering braid (only required for part 2)
- Thin (30 AWG) insulated wire (wire wrap) (only required for part 2)
- Maybe some hot glue or similar for sticking the wires to the mainboard (only required for part 2)
- A good, fixed, magnifying glass.
Part 1. Preparing the GumPack
- Turn the GumPack OFF. This is important to avoid damage.
- Remove the 8 cross-head screws and put them in a safe place.
- Remove the back and front covers of the GumPack, they should come off easily, DO NOT use brute force.
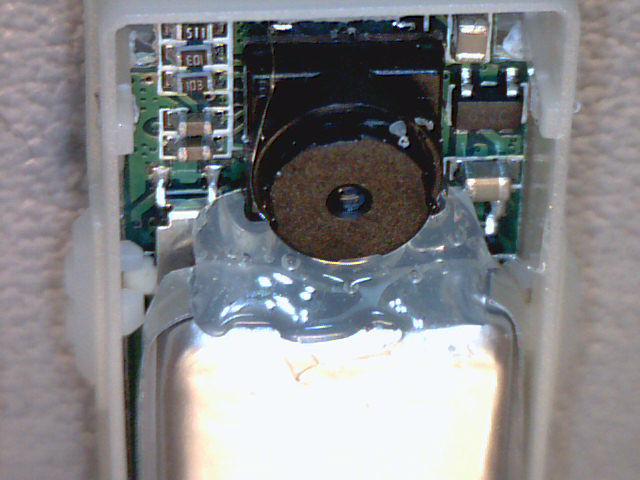
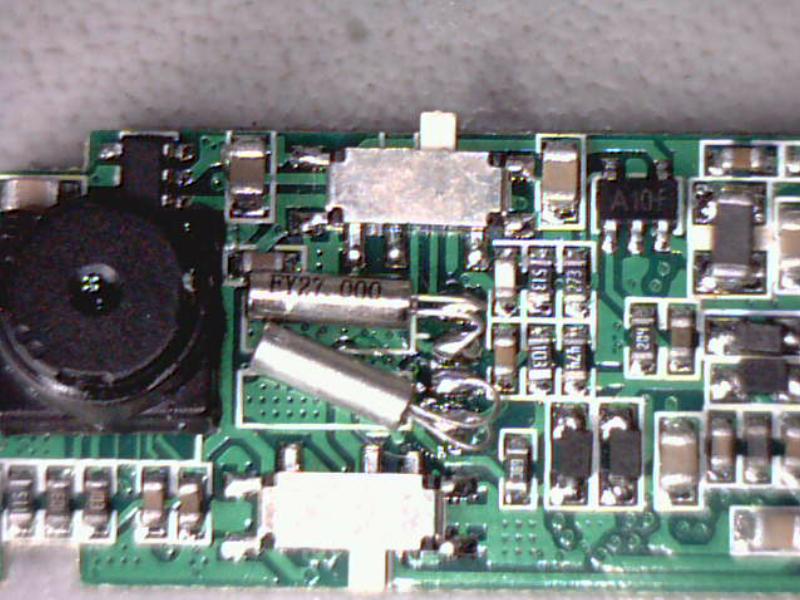
- Mark the top left corner of the lens body with a tiny spot of Tipp-Ex.
Don't mark the lens itself! The lens is in a socket and it can easily fall
out. The spot allows the lens to be correctly positioned in case this
happens. Some Lenses have a white spot on the left top underside. In this
case it is not necessary to mark the lens (see the picture below).
- The battery may be attached by hot-glue or sticky foam. Carefully free
the battery (don't disconnect it yet) and VERY CAREFULLY clean up
any mess left behind. Be careful not to break or scrape any components or
the board.
- Carefully remove the mainboard, which can be quite tricky. Start at the sides and top. Pull the sides slightly apart to disengage the switches (these can easily be broken) and ensure that they are free before easing out the top. Don't let the battery hang on it's wires, or they may break. The board must be removed from the top first because the USB socket is held tightly in place by the plastic. Remove the board at an angle of about 30 degrees, pulling gently at the top. Make sure that the two plastic sliders do not separate from the main plastic surround - they too can break easily.
- Turn on the soldering iron and set the temperature to about 375°C (700°F).
- Write down, or take a picture, of the battery connectors. On some boards
the red connector pad is marked with a +.
- Desolder the two battery connectors, making sure not to short circuit the battery in the process.
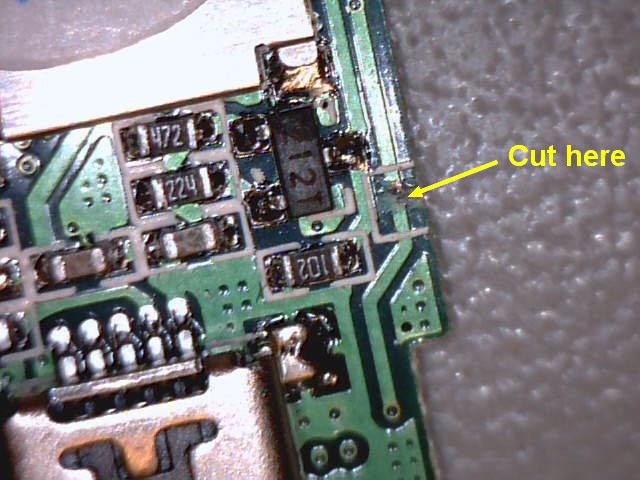
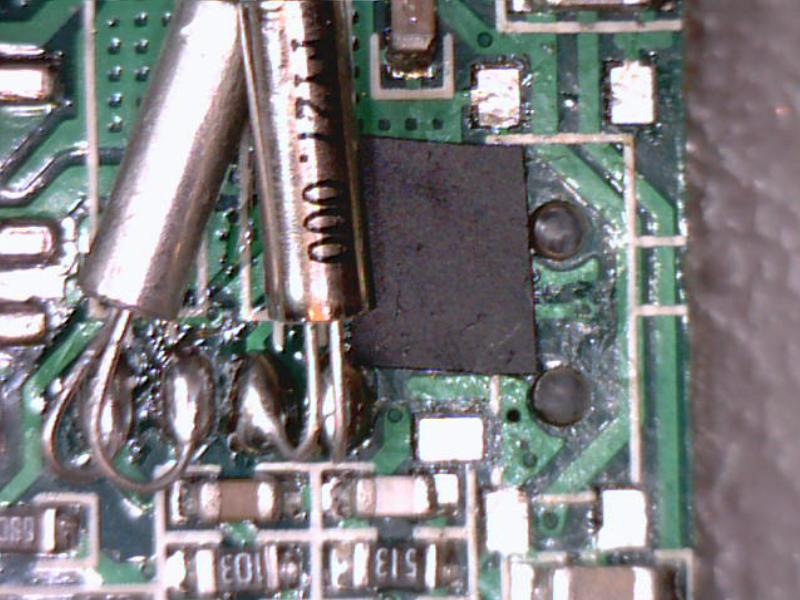
- Locate the copper track and carefully cut it.
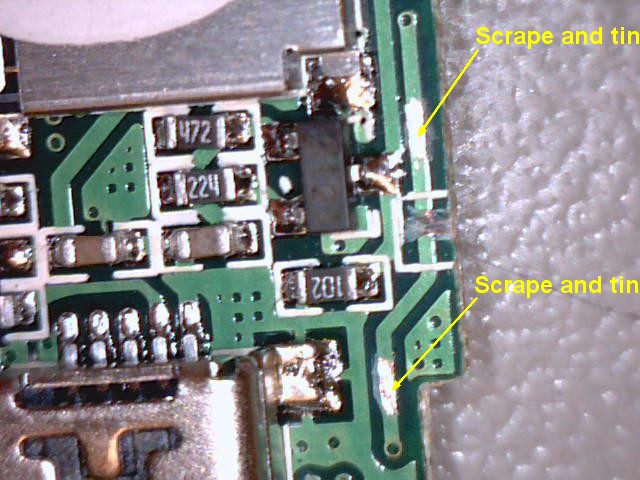
- If you will be attempting the second part, then scrape away the green
protection varnish at a suitable point above and below the cut and tin
these points.
- Resolder the battery, being very careful not to invert the negative and positive wires.
- Reassemble the GumPack, inserting the bottom part of the board first, and pay special attention to the two side switches. Slightly pull apart the long edges of the plastic "cage" while easing the board into place. Replace the back and front covers and replace the 8 screws. Don't overtighten the screws or you will damage the plastic thread.
Make sure that the SD card is inserted, then test the GumPack.
Part 2. Modifying the Switch
This part requires pretty good SMD soldering skills.
- Since we will be soldering near the lens, it is best to remove it.
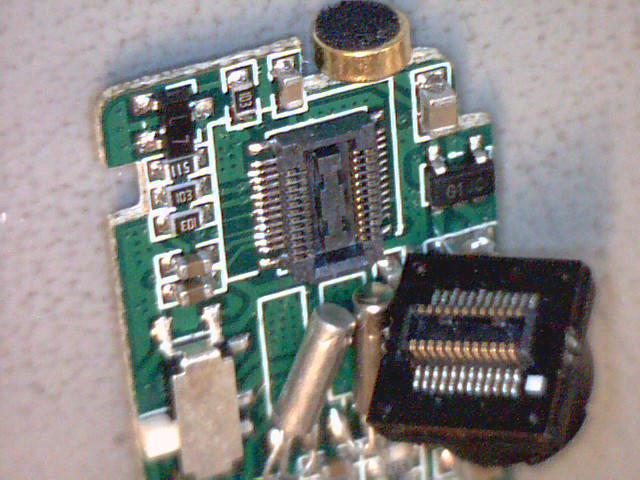
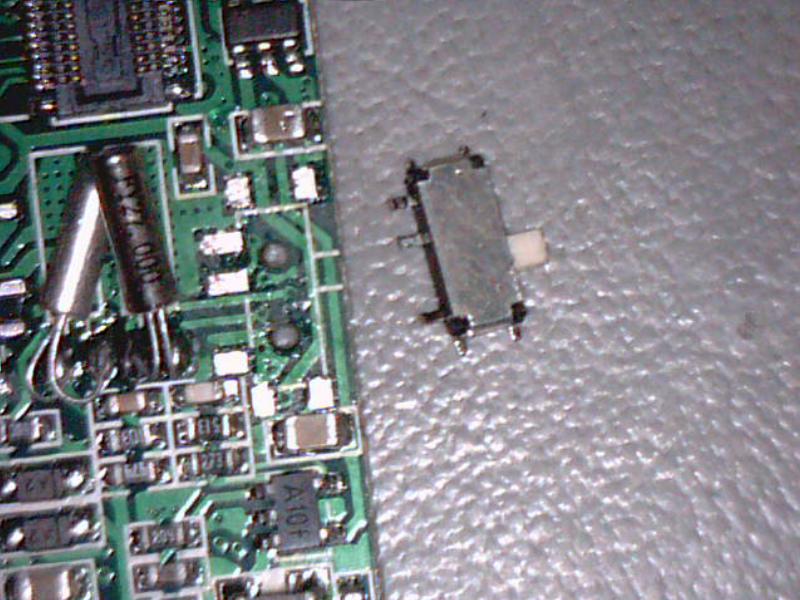
- Remove the Photo-Video switch (make sure you remove the correct switch!).
Remove the solder from the 4 chassis pins and the 3 connection pins using
thin desoldering braid. Apply heat to one of the chassis pins and gently
lift the corner. Using a very small screwdriver may help. The solder joint
should come free without using force. Repeat this on the remaining 3
chassis solder points and finally, very carefully, free the switch
connections. The connector farthest away from the other two is the video
connector. It is soldered to a "dead" (non connected) pad
- Remove any remaining solder from the pads using desoldering braid
- Place a piece of electricians insulating tape over the top two pads
- Solder a 15cm (6 inch) length of wire onto the "top" (Photo position) leg of the switch
- Solder a 15cm (6 inch) length of wire onto the "middle" leg of the switch
- Slightly bend these two legs upward so that they will barely touch the insulation tape when the switch is resoldered in place
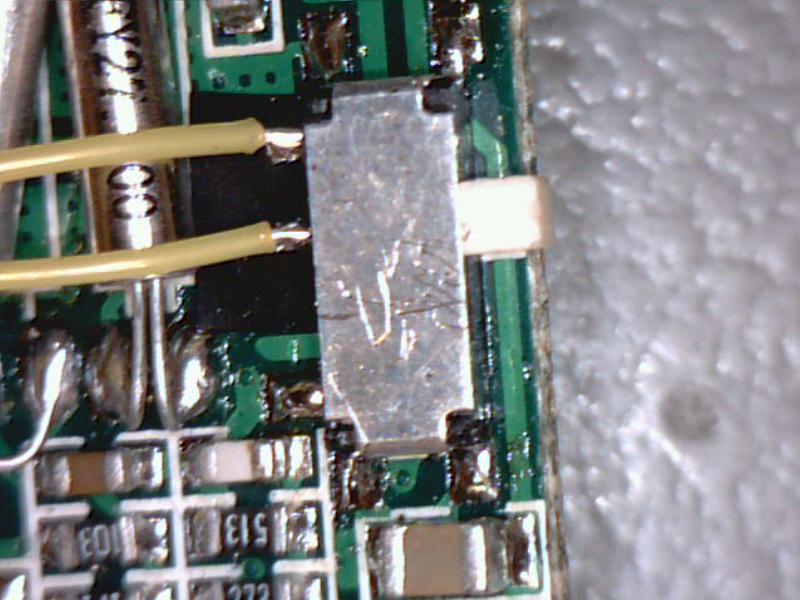
- Resolder the switch into position using the 4 chassis solder points and
the "dead" pad. Use fresh solder
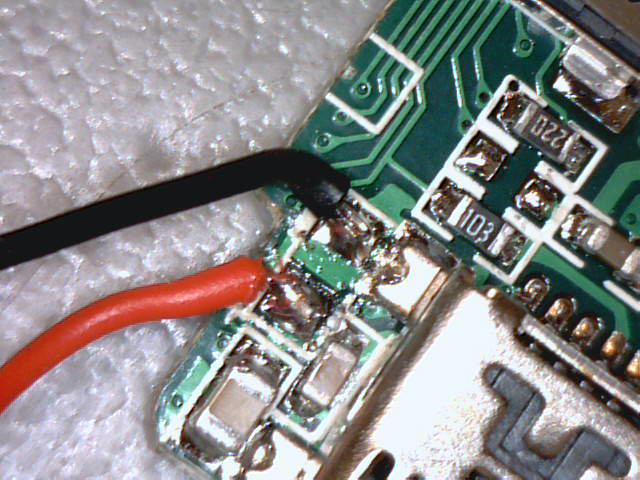
- Cut the top wire to the correct length and solder it to the furthest side of the track that was cut in part 1
- Cut the remaining wire to length and solder it to the other side of the
track that was cut in part 1
- Apply a small blob of hot glue to stick the wires to the board
- Reassemble the board as explained in Part1, and don't forget to pop the lens back in


Findings
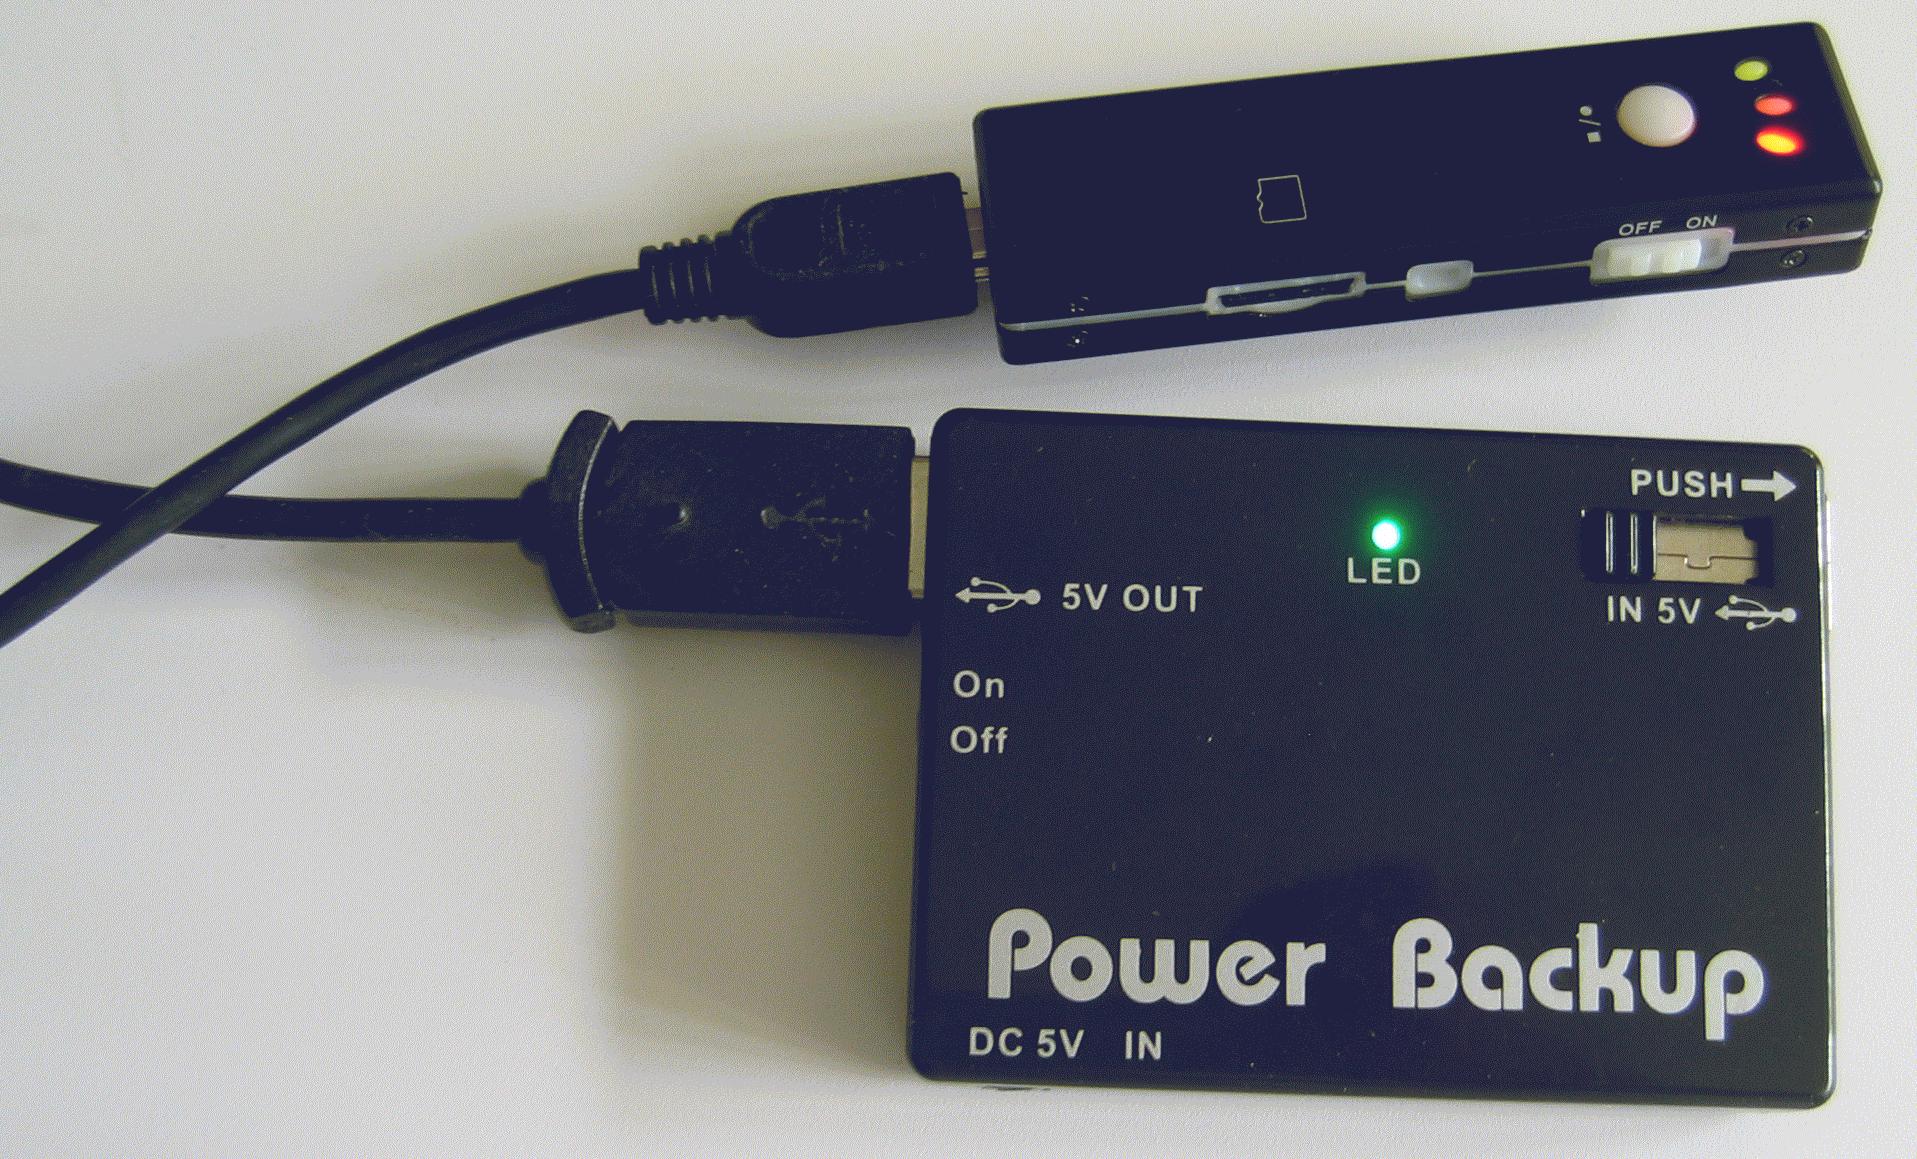
Using a 32GB micro SD card I can record about 7 hours of continuous video, broken up into 4GB chunks. The total time appears to depend on the lighting conditions and movement.
The USB powerpack pictured at the top of the page is specified as 2400mAh. If it is fully charged and the internal battery is also fully charged it is possible to record until the 32GB SD card is full. I purchased this battery pack about a year ago on eBay. I prefer to use the much more powerful (4400mAh), albeit heavier (150g, 5.29oz), battery pack from Just Mobile which is ironically called the Gum Pro.
Useful sites
These sites provide other excellent information on these cameras
http://www.pluc.fr/2010/02/tear-down-and-hacking-around-gumpack-camera/
I have provided another How-To article here if you wish to get rid of that very annoying timestamp on these, otherwise, excellent cameras.
Thank you for reading.
Isoprop
![]()
Last updated: 26th August 2010